Can You Make a Flour Batik Wall Hanging?
 Step 1
Gather the materials you’re going to use.
 Step 2
Mix some flour and water to make a fairly thick smooth ‘paste’. It should be fluid enough to
squeeze through the top of a washing-up liquid bottle. Pour it from the bottle in a pattern on
to a piece of white cotton fabric. Wait for it to dry and form a crust. It will take about three days.
 Step 3
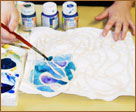
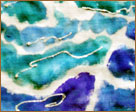
Use fabric paints to paint the areas of the fabric not covered by the flour mixture.Allow the colours
to mix and blend. Why not add some water to the paints to create different tones of colour. Crack
the flour a little in places so that the paint will spread underneath to create a veined effect
 Step 4
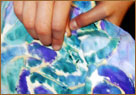
When the paint is dry, pick off the flour. Look! You have made a flour batik.
 Step 5
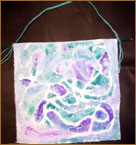
Why not decorate it by adding some decorative lines and swirls with gutta? Or you could do some decorative stitching or sew on beads or buttons. Go on … be creative!
 Step 6
When it is finished, turn down a hem on top and sew it. Put a light stick through the seam and make a plait from wool to use as a hanger. Now, your flour batik wall hanging is ready for display!
 Step 7
Options: Why not decorate your wall hanging with colourful stitches or sew on beads, buttons, lengths of ribbon or plaited wool. Be adventurous!